Sunday, April 15, 2012

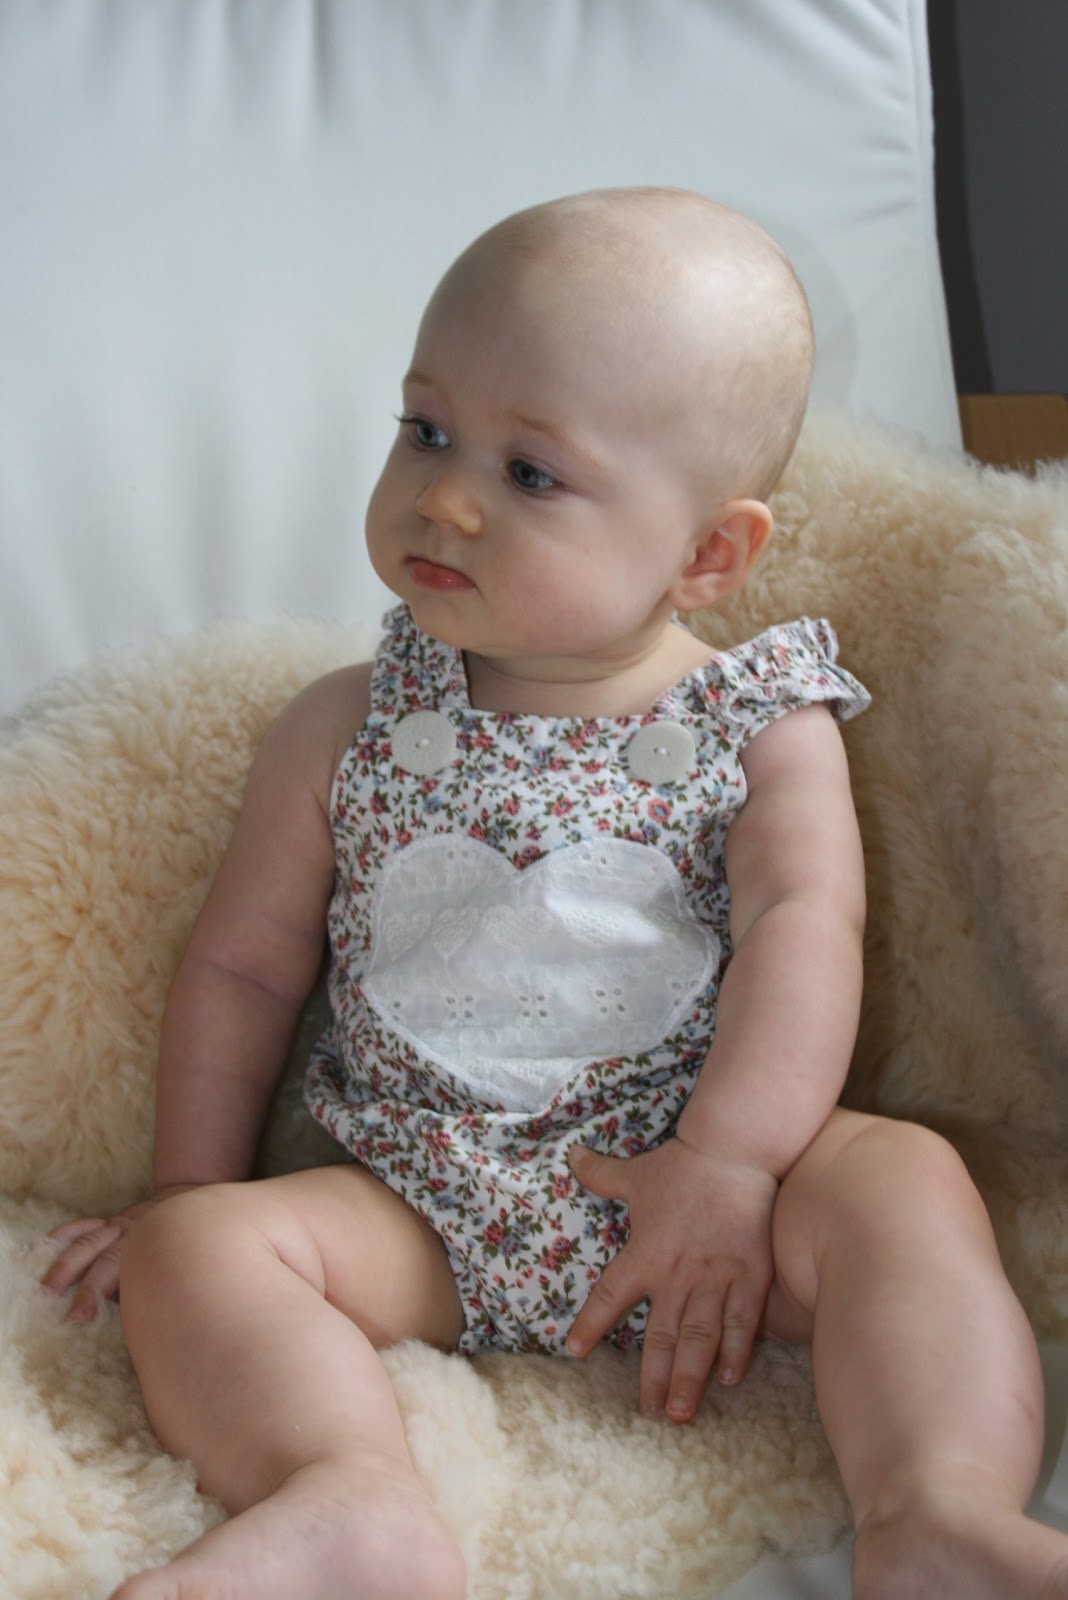
Bringing back the Suspenders

I am in love with French label Lili Gaufrette. They make gorgeous and delicately stylish clothing for girls and babies, although the latter is very hard to find. The garments are made from the highest quality fabrics and are finished with an equally high attention to detail. Of course you pay for quality. Alyssa has a few items I purchased from OZSALE (with discounts of about 80%) and I eagerly anticipate each subsequent sale, but am disappointed when time after time they only have the smallest sizes available. The few things I purchased were size 1 month, 3 months and 6 months and she has outgrown everything.

...so I decided to try and make something myself. I'm not sure if this outfit looks particularly French but that's where I got my inspiration, along with these two pictures I found on the net:

It was super easy to make. Its basically two long rectangles. One for the waistband and one for the skirt. The waistband actually has another layer of material on the inside as well as a couple of layers of interfacing to stiffen it. I turned the raw edges of the waist band in, gathered the skirt to match the length, tucked it between the two layers of the waistband and then sewed the waistband all in one go. I hadn't really though about how to do the back up. I decided on snaps (the sew-on kind) for the waistband and buttons for the skirt. That way as she grows I can simple move the snaps over to accommodate.


It was my first time making suspenders, or braces I think we call them in NZ/Aussie. I looked at Alyssa's pram straps to work out how to put them together, as the adjustable feature had me confused for a minute or so. The only difficult thing was paying $14 for the clips (I needed two sets) at Spotlight... eek the most expensive part of the outfit. I guess I should add that the corners of them are a little sharp and the whole idea of braces possibly a little impractical for a bubby so young. I might have another go at this outfit when she is 2 or 3 years old.


Can you see the suitcase in the background? We are going to New Zealand for a month to see my Mum and Sister. I'm packing fabric and some of my sewing essentials. Mum's had her sewing machines' serviced and has booked me in for some lessons. I'm looking forward to having a baby sitter while I sew. It's so hard to sew sometimes when all you have is 5 minutes here or there.


I totally think there is a market out there for making cool colourful suspender clips. Some pretty pink flower suspender clips would have been fab!

Monday, March 26, 2012

Japanese Inspired Harem Pants

I can't keep my baby still long enough to take a photo. She is seriously on the move!

We went along to Baby Rhyme Time at the library this morning and all the other mums were amazed that at seven months she can get herself across the floor at super sonic speed. When Alyssa sees something she wants and then realises there is nothing in her way, she makes an excited grunt of satisfaction (I don't know how else to describe it) all the way across the floor until she reaches her target.

I look at my baby now and see someone who is independent, observant and social. It is a really strange feeling that she is no longer an extension or part of myself. She is not very cuddly. I pick her up and she twists and turns until she has full view of the world. She responds to her name. Even in a noisy group of babies she looks up to find Mum. If she hears me call our dog ("Chloe") she looks around to see where her buddy is.

We are busy renovating our house at the moment so the sewing machine has been packed away. I actually don't miss it. I'm glad to have a little holiday. In three weeks time I will probably be going through withdrawals.

It's getting a little cooler here in the mornings and evenings and I wanted to experiment with a pair of light cotton pants for Alyssa. I chose a Tana Lawn fabric from Spotlight. I love this Japanese fabric. It's so lovely and soft. The pattern was an experiment. I liked the idea of a wide bum and skinny legs. The cut was designed for a knit so I gave some extra width and then compensated for the waistband with extra length. I struggled with turning the top of the pants in to create the casing for the elastic, so had to cut an additional strip for this. It wasn't on the true bias, really only a slight angle so even that was hard to turn inside. I put elastic at the ankle to help keep the bottom of the pants from riding up.

Here is the result:


Saturday, March 17, 2012

Obsessed with Sunsuits

I got a little obsessed with making sunsuits. They are just so adorable. It's still hot here in Queensland so Alyssa will get a few wears out of them.

What I have discovered is by simply playing around with fabrics and modifying the designs slightly I get a completely different result. It is a lot of fun.

This is the Little Betty Sunsuit with ruffles on the straps instead of the bottom. I made a mistake and the seams of the straps ended up facing the front so I decided to put an extra layer of fabric on them. It worked really well as it made the straps stronger. I found that with the original pattern (see next image & my previous post) the front of the straps didn't sit flat and twisted and folded with Alyssa's movements.


With the sunsuit below I thought it would be a good idea to make it a little higher in the back and a little wider at the crotch. It ended up being too high and too wide. I have a growing appreciation for pattern makers. It is not as simple as it looks!


This is the same pattern I used for my Vintage Sunsuit and the Pretty in Blue Sunsuit. I really like the effect from using two contrasting fabrics. It makes it much more interesting. I was unsure about the fabric choice right up until the final seam was sewn, but I think I like it. 


Tuesday, February 28, 2012

Ruffle Sunsuit

Who doesn't love free things?

I Googled "Free sunsuit pattern baby" and found this wonderful ruffle sunsuit pattern by little betty.

Everything went swimmingly. I kept getting further and further towards finishing it thinking somethings gotta go wrong now, but it never did. Quite proud of myself actually!


I am learning to sew, so the NEW (never attempted before) techniques I learnt/did while making this sunsuit were:

Buttonholes! I didn't realise there was a buttonhole foot and a button foot. I eyed up the button foot for a long time before I picked up my sewing machine manual... then proceeded to sew eight buttonholes (with the correct foot) before I was satisfied.

Interfacing! Isn't it great. I have the iron-on stuff. I'm not sure if it is as stiff as normal-not-iron-on interfacing so I used another piece of the Babushka dolls fabric as well.

Snaps! I'd tried these before by myself and failed miserably. My dad is staying with us at the moment. He is a tradie and well, what are Dad's and tradies for??? Hammering in the snaps. Yus :) it worked a treat. I warned him after he'd finished that he would have that task at least once a week now.

Ruffles! Well they were a mission. Little Betty's instructions said I could use an overlocker/serger. I attempted it on a scrap and decided that they would be nicer (safer) if I did the gathering by hand. I love them. I think ruffles may show up more often now.


Thank you to my lovely mum-in-law for the beautiful fabric.

Monday, February 20, 2012

My Shirring Experiment

I'm totally shirred out after making this sunsuit.

I was blog hopping like mad a few weeks ago when I discovered and bookmarked Rae's Baby Sunsuit Tutorial. It looked so simple. It uses two rectangles of fabric, has straps and the shirring (the gathering at the top) looked easy enough to do.

Boy was I wrong.

First I will show you the finished product as I surprised myself at my perseverance to complete this project. Then really I have nothing else to say apart from few 'lessons' I learnt along the way.


Alyssa has started to sit up by herself. Very Exciting!


Ok so my lessons...
  • Measure your baby. I used Rae's measurements of 16" x 19" for 6-12 months. Which is fine. Except I rotated my fabric 90 degrees and proceeded to make version one of this sunsuit. Obviously it turned out way too short.
  • If you are using the snaps that you sew on, make sure you use ones that are very strong. Thankfully I learnt my lesson on version one.
  • Practice, practice, practice shirring. But firstly make sure you know how to adjust the tension on your machine. This site helped me (I have a Brother machine) http://gigglesmum-creativeheart.blogspot.com.au/2009/10/shirring-problems-i-cracked-it.html. I didn't bother tightening the screw on the bobbin casing but did follow this piece of advice: "If I threaded the bobbin with the needle plate cover on, the elastic thread was not linking in correctly to the casing and I could not shir."
Changes to the original pattern:
  • It took me a week to work up the courage to sew two button holes onto the straps. I then attached the straps to the sunsuit, crossing them at the back. Upon trying the sunsuit on a baby who was DONE being my model, I decided that I wasn't 'quite done'. The straps didn't sit neatly and the buttons slid to the top of the hole. I chopped off the button holes (girraaaah) and sewed the ends to the inside of the top. I left it a few days before we had our photoshoot.
  • I noticed Rae had about 6-7 rows of shirring. Obviously I still haven't acquired the skill completely as I needed about 15 to get the top to gather up enough. 

Friday, February 17, 2012

Love Love Wall Art!

I needed a quick easy project to give me a bit of a boost this week. I have been working on a made by RAE Baby Sunsuit and its been very frustrating to say the least. I know I have to keep persevering with this sewing thing...

Embroidery hoop wall art is so easy to do. I was very pleased with my first attempt.


It also gave me a chance to experiment with appliqué. Firstly I tried appliquéing some of the birds onto the plain fabric using a dark grey cotton. It looked messy. I put it down for a day while I though about what else to try. Eventually I figured out that using shapes to make an object (a bird house) as well as using a lighter cotton produced a much neater and satisfactory result. Sewing finished!

Some lessons:
1. I ironed on some interfacing to the birdhouse before I appliquéd it to the main fabric. I also used a tacking stitch to hold it in place instead of pins. (I feel so stupid that I haven't utilised the tacking stitch more before now!)
2. I used double sided tape to stick the excess fabric to the inside of the hoop. This was super easy and much better than fiddling around with glue.


Thursday, February 9, 2012

Pretty in Blue

So happy with how my second attempt at the sunsuit turned out. First attempt here. Not really much to say except this time around I made sure I got the tension right. I read my sewing machine manual and figured out exactly how to fix it. The vintage sunsuit hasn't fallen apart, but the stitching looks pretty shonky. I always sew a few lines on a test patch of material before I start now too.


I made the next size up but forgot to add the extra length for the elasticated waist (from an altered Newlook 6903), so its a bit short. I think I have used that pattern to death now. I'm ready for something a bit different and more challenging.

My lil model stares at the camera as soon as it comes out and is so intrigued that its hard to get a natural shot :) She also loves to check out the photo afterwards too.


Thank you to my wonderful Mother-in-law who kindly sewed on the snaps. I HATE that job.


Share